はじめに
プログラミングを学び始めてから2か月の初心者です。最近は初心者でも出来る色んな技にチャレンジして体感しながら勉強しています。というわけで、今回はと~っても面倒なログイン機能を「さささ~」という感じで実装できちゃうAuth0を使ってみました。
Auth0とは?(超初心者的解釈)
Auth0とはWebやスマホアプリに対して認証機能をクラウドを介して提供してくれるサービスのこと。有難いことにLine,Google, Facebook, Twitterなど有名どころのSNSと既に連携していて、簡単な操作でそれらを使ったログイン機能を自分のWEBに付加することが出来ます。
初心者的に有難いことにはサイトを作る前からログイン機能だけテストが出来たり、サンプルサイトを用意してくれていたりとても親切。しかも一定時間・量までは無料なので助かります。
詳細はこちらでも紹介されています。
目指すもの
年末ということで引き続き、カレンダーをテーマにすることにしました。
Auth0を使ってLineやGoogleのアカウントを使ってログインすると
アカウント写真付きのカレンダーを表示します。
環境
Node.js v10.16.3
Windows 10 pro
Visual Studio Code v1.39.1
Auth0
Bootstrap
方法
1.まずはAuth0のサイトにてサインインからアカウントを作成します。
登録したメールにVerifyメールが来るので迷惑メールに入らないように気を付けます。
2.サインイン出来たら+Create Application→Nameに適当な名前
→Single Page Web Applications→Createをクリック
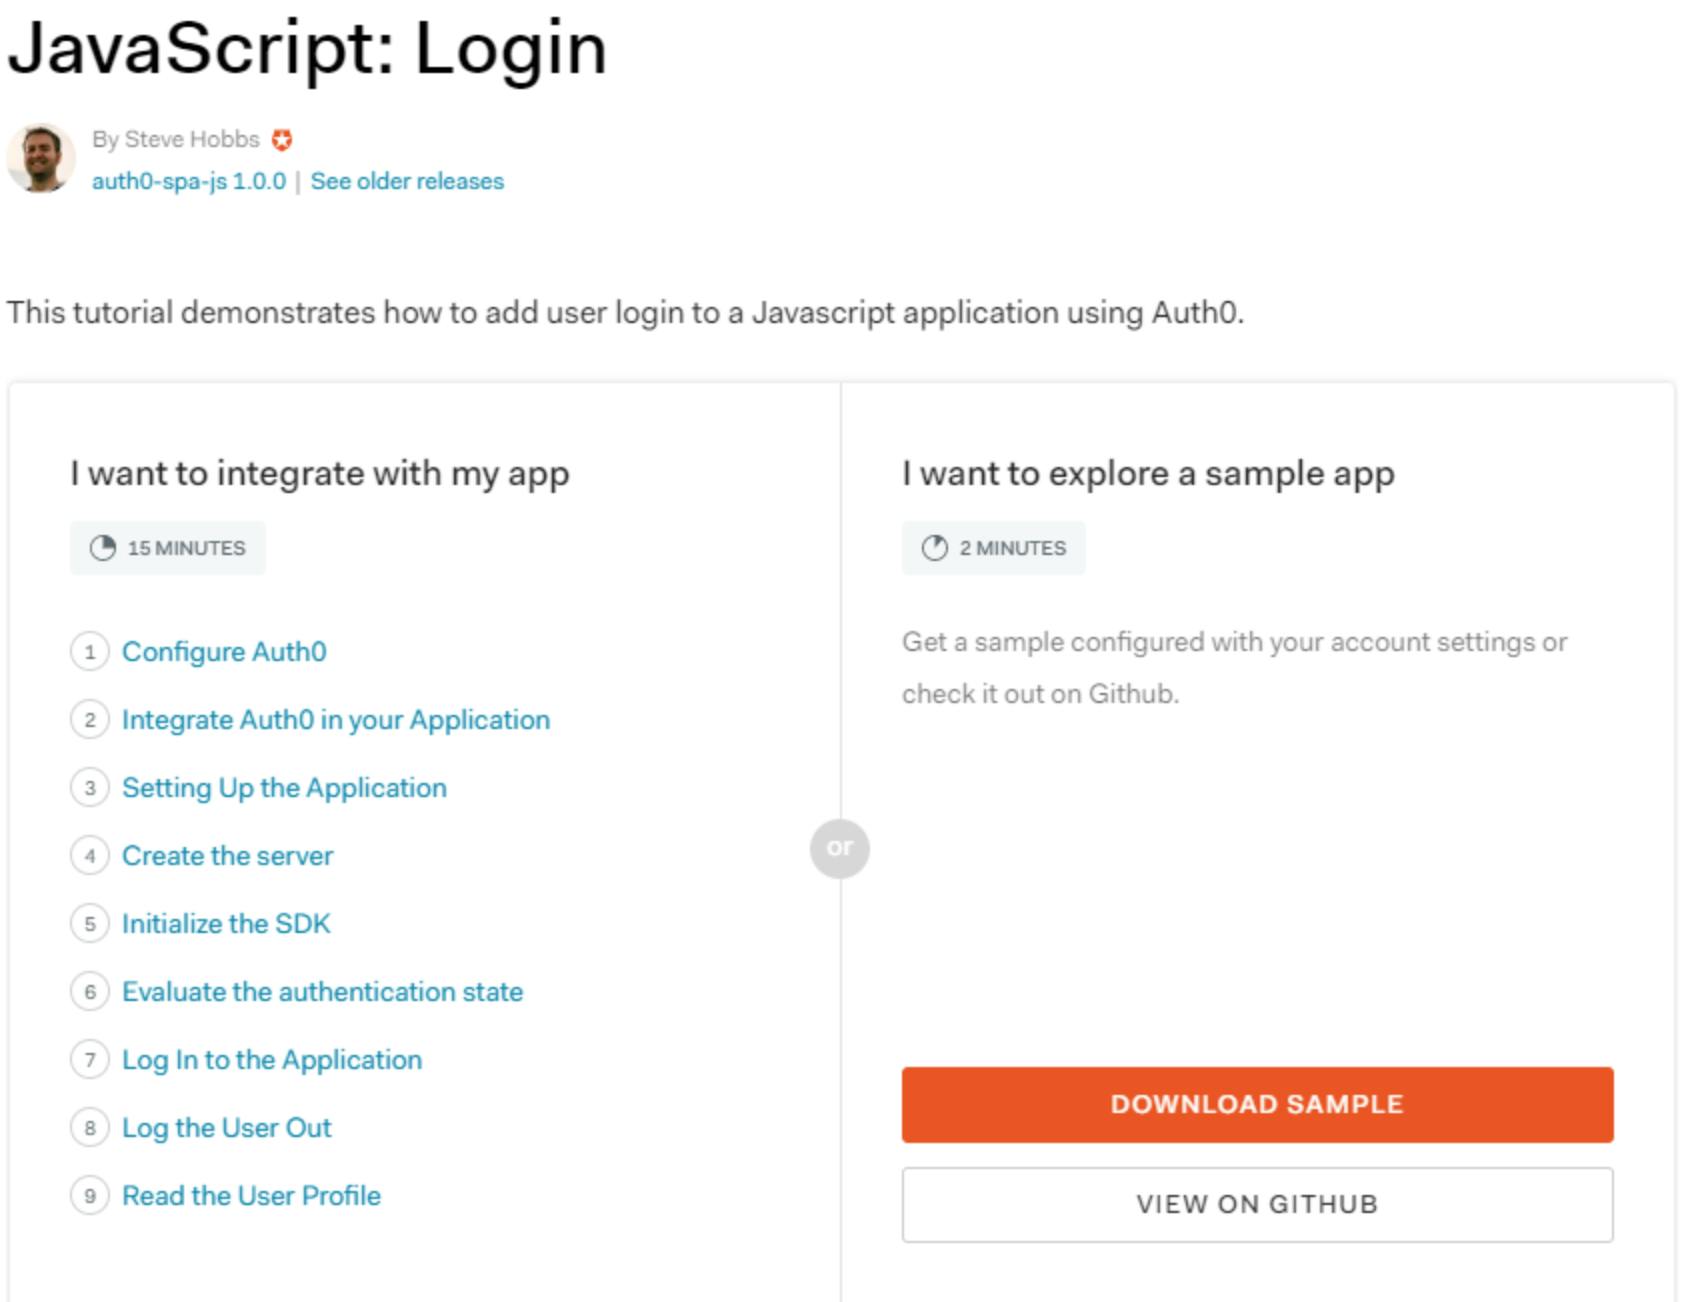
3.黄色のJavaScriptを選択したのち、オレンジのDownload sampleをクリック
4.こちらの赤枠のApplication Settingsを別タブで開き、下記の情報を参照しながら入力していきます。終わったら下の方にある水色のSAVE CHANGESをクリックして保存します。
5.すると元の画面に戻りオレンジのDownloadボタンをクリックし、ダウンロードされたファイルを解凍(展開)しておきます。
6.Visual Studio Codeで解凍したファイルを開きます。New Terminalを開き、まずは下記でフォルダを移動
cdvanillajs-01-login/01-login7.インストールを実施
npmi8.今回はあらかじめ設定されているローカルサーバーをスタート
npmstart9.こちらを参照にしながらLINEのログイン機能も追加。Auth側への情報はチャンネルIDやシークレットトークンが必要。入力してSAVEするとTRYというボタンが出てくるので、ログイン可能か確認。
10.基本的にindex.htmlファイルを変更して遊ぶ。今回は私の場合はカレンダーを出力したかったのでこちらを参考にいたしました。またスタイルシートの部分についてはこちらはBootstrapが使われていたのでそのホームページで調べながら変更しています。
コード
<!DOCTYPEhtml><htmlclass="h-100"><head><metacharset="UTF-8"/><title>SPASDKSample</title>
<linkrel="stylesheet"href="https://stackpath.bootstrapcdn.com/bootstrap/4.3.1/css/bootstrap.min.css"/><linkrel="stylesheet"type="text/css"href="/css/auth0-theme.min.css"/><linkrel="stylesheet"type="text/css"href="/css/main.css"/><linkrel="stylesheet"href="//cdnjs.cloudflare.com/ajax/libs/highlight.js/9.15.6/styles/monokai-sublime.min.css"/><linkrel="stylesheet"href="https://use.fontawesome.com/releases/v5.7.2/css/solid.css"integrity="sha384-r/k8YTFqmlOaqRkZuSiE9trsrDXkh07mRaoGBMoDcmA58OHILZPsk29i2BsFng1B"crossorigin="anonymous"/><linkrel="stylesheet"href="https://use.fontawesome.com/releases/v5.7.2/css/fontawesome.css"integrity="sha384-4aon80D8rXCGx9ayDt85LbyUHeMWd3UiBaWliBlJ53yzm9hqN21A+o1pqoyK04h+"crossorigin="anonymous"/><linkrel="stylesheet"href="https://cdn.auth0.com/js/auth0-samples-theme/1.0/css/auth0-theme.min.css"/><style>.calendar-title{text-align:left;}</style>
</head>
<bodyclass="h-100"><divid="app"class="h-100 d-flex flex-column"><divclass="nav-container"><navclass="navbar navbar-expand-md navbar-light bg-light"><divclass="container"><divclass="navbar-brand logo"></div>
<buttonclass="navbar-toggler"type="button"data-toggle="collapse"data-target="#navbarNav"aria-controls="navbarNav"aria-expanded="false"aria-label="Toggle navigation"><spanclass="navbar-toggler-icon"></span>
</button>
<divclass="collapse navbar-collapse"id="navbarNav"><ulclass="navbar-nav mr-auto"><liclass="nav-item"><ahref="/"class="nav-link route-link">Home</a>
</li>
</ul>
<ulclass="navbar-nav d-none d-md-block"><!--Loginbutton:showifNOTauthenticated--><liclass="nav-item auth-invisible"><buttonid="qsLoginBtn"onclick="login()"class="btn btn-primary btn-margin auth-invisible hidden">Login</button>
</li>
<!--/Loginbutton--><!--Fullsizedropdown:showifauthenticated--><liclass="nav-item dropdown auth-visible hidden"><aclass="nav-link dropdown-toggle"href="#"id="profileDropDown"data-toggle="dropdown"><!--Profileimageshouldbesettotheprofilepicturefromtheidtoken--><imgalt="Profile picture"class="nav-user-profile profile-image rounded-circle"width="50"/></a>
<divclass="dropdown-menu"><!--Showtheuser's full name from the id token here -->
                    <div class="dropdown-header nav-user-name user-name"></div>
                    <a
                      href="/profile"
                      class="dropdown-item dropdown-profile route-link"
                    >
                      <i class="fas fa-user mr-3"></i> Profile
                    </a>
                    <a
                      href="#"
                      class="dropdown-item"
                      id="qsLogoutBtn"
                      onclick="logout()"
                    >
                      <i class="fas fa-power-off mr-3"></i> Log out
                    </a>
                  </div>
                </li>
                <!-- /Fullsize dropdown -->
              </ul>

              <!-- Responsive login button: show if NOT authenticated -->
              <ul class="navbar-nav d-md-none auth-invisible">
                <button
                  class="btn btn-primary btn-block auth-invisible hidden"
                  id="qsLoginBtn"
                  onclick="login()"
                >
                  Log in
                </button>
              </ul>
              <!-- /Responsive login button -->

              <!-- Responsive profile dropdown: show if authenticated -->
              <ul
                class="navbar-nav d-md-none auth-visible hidden justify-content-between"
                style="min-height: 125px"
              >
                <li class="nav-item">
                  <span class="user-info">
                    <!-- Profile image should be set to the profile picture from the id token -->
                    <img
                      alt="Profile picture"
                      class="nav-user-profile d-inline-block profile-image rounded-circle mr-3"
                      width="50"
                    />
                    <!-- Show the user'sfullnamefromtheidtokenhere--><h6class="d-inline-block nav-user-name user-name"></h6>
</span>
</li>
<li><iclass="fas fa-user mr-3"></i>
<ahref="/profile"class="route-link">Profile</a>
</li>
<li><iclass="fas fa-power-off mr-3"></i>
<ahref="#"id="qsLogoutBtn"onclick="logout()">Logout</a>
</li>
</ul>
</div>
</div>
</nav>
</div>
<divid="main-content"class="container mt-5 flex-grow-1"><divid="content-home"class="page"><divclass="text-center hero"><imgclass="mb-3 app-logo"src="https://1.bp.blogspot.com/-RJRt_Hv37Kk/VMIu-CCBpII/AAAAAAAAq2E/JsIJ8pPwmuY/s400/calender_takujou.png"alt="JavaScript logo"width="75"/><h1class="mb-1 text-warning">CalendarSampleProject</h1>
<pclass="lead text-center">カレンダーを作ってみよう</p>
</div>
<h2class="mb-4 text-center"><aclass="lead auth-visible hidden"><iclass="text-center"></i> カレンダー例
</a>
<aclass="auth-visible hidden"><imgalt="Profile picture"class="nav-user-profile profile-image rounded-circle"width="100"/></a>
<h6class="calendar-title text-center auth-visible hidden"><spanid="js-year"></span>年 <span id="js-month"></span>月</h6>
<divclass="mx-auto auth-visible hidden"style="width: 200px;"><tableclass="calendar-table"><thead><tr><th>日</th>
<th>月</th>
<th>火</th>
<th>水</th>
<th>木</th>
<th>金</th>
<th>土</th>
</tr>
</thead>
<tbodyid="js-calendar-body"></tbody>
</table>
</div>
</h2>
</div>             </div>
<divclass="page"id="content-profile"><divclass="container"><divclass="row align-items-center profile-header"><divclass="col-md-2"><imgalt="User's profile picture"class="rounded-circle img-fluid profile-image mb-3 mb-md-0"/></div>
<divclass="col-md"><h2class="user-name"></h2>
<pclass="lead text-muted user-email"></p>
</div>
</div>
<divclass="row"><preclass="rounded"><codeid="profile-data"class="json"></code></pre></div>
</div>
</div>
</div>
<footerclass="bg-light text-center p-5"><divclass="logo"></div>
<p>Sampleprojectprovidedby<ahref="https://auth0.com">MARUKO</a>
</p>
</footer>
</div>
<scriptsrc="https://cdnjs.cloudflare.com/ajax/libs/jquery/3.3.1/jquery.min.js"></script>
<scriptsrc="https://stackpath.bootstrapcdn.com/bootstrap/4.3.1/js/bootstrap.bundle.min.js"></script>
<scriptsrc="js/auth0-theme.min.js"></script>
<scriptsrc="https://cdn.auth0.com/js/auth0-spa-js/1.2/auth0-spa-js.production.js"></script>
<scriptsrc="//cdnjs.cloudflare.com/ajax/libs/highlight.js/9.15.6/highlight.min.js"></script>
<scriptsrc="js/ui.js"></script>
<scriptsrc="js/app.js"></script>
<script>var$window=$(window);var$year=$('#js-year');var$month=$('#js-month');var$tbody=$('#js-calendar-body');vartoday=newDate();varcurrentYear=today.getFullYear(),currentMonth=today.getMonth();$window.on('load',function(){calendarHeading(currentYear,currentMonth);calendarBody(currentYear,currentMonth,today);});functioncalendarBody(year,month,today){vartodayYMFlag=today.getFullYear()===year&&today.getMonth()===month?true:false;// 本日の年と月が表示されるカレンダーと同じか判定varstartDate=newDate(year,month,1);// その月の最初の日の情報varendDate=newDate(year,month+1,0);// その月の最後の日の情報varstartDay=startDate.getDay();// その月の最初の日の曜日を取得varendDay=endDate.getDate();// その月の最後の日の曜日を取得vartextSkip=true;// 日にちを埋める用のフラグvartextDate=1;// 日付(これがカウントアップされます)vartableBody='';// テーブルのHTMLを格納する変数for(varrow=0;row<6;row++){vartr='<tr>';for(varcol=0;col<7;col++){if(row===0&&startDay===col){textSkip=false;}if(textDate>endDay){textSkip=true;}varaddClass=todayYMFlag&&textDate===today.getDate()?'is-today':'';vartextTd=textSkip?'':textDate++;vartd='<td class="'+addClass+'">'+textTd+'</td>';tr+=td;}tr+='</tr>';tableBody+=tr;}$tbody.html(tableBody);}functioncalendarHeading(year,month){$year.text(year);$month.text(month+1);}vartoday=newDate();varcurrentYear=today.getFullYear(),currentMonth=today.getMonth();</script>
</body>
</html>
結果
ログイン前はこのような何もないホームページですが
ログインを経て
写真付きのカレンダーが表示されます。
感想
提供されているサンプルバージョンを参考にしながら、単純ですがログイン前とログイン後の違いを出すような仕組みを作ることが出来ました。こちらのAuth0のサンプルページが非常にシンプルかつ応用しやすいコードになっていたので、手探りでテストしながらイメージのものに少しづつ近づけることが出来ました。万が一、壊しても再度サイトからダウンロードすればよいだけなので初心者にはとてもお勧めです。